This article on how to install an SSL certificate on cPanel was first published to GoDaddy’s U.S. blog on 20 July 2018 and updated and republished to the Canada blog on 8 August 2022.
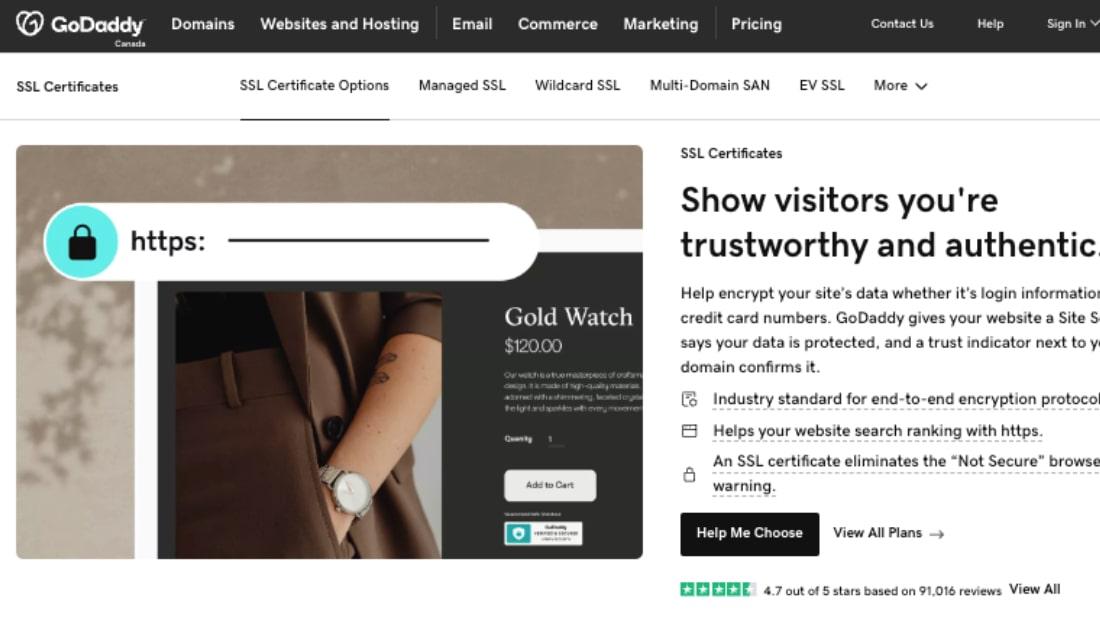
Since July 2018, the Chrome web browser has been labeling all sites that have not migrated to HTTPS as “not secure.”
Seeing this label obviously won’t inspire confidence for your users, which is a key reason that many websites have moved away from HTTP (hypertext transfer protocol) to HTTPS (hypertext transfer protocol secure).
It’s also an all-around good idea, because it’s an easy way to protect users who visit your web site. This post offers instructions to help you install an SSL certificate on cPanel.
The Chrome browser has about 65% market share at the time of republication.
The difference between http:// and https:// URLs is simple: security.
The “S” tacked onto the end signifies that the server uses encryption when communicating with the user’s browser.
That means any attempt to intercept the information exchanged between the browser and the server would only deliver gibberish to the attacker rather than useful information such as:
- Username and password
- Credit card number
Without the “S,” information is exchanged in plain text, which means that anyone who intercepts it can read it.
Web browsers such as Chrome, Firefox, Safari, Edge and Internet Explorer display a padlock icon in the browser bar to indicate that a server is using HTTPS.

The only way to avoid the “not secure” label is to modify your server to employ HTTPS. Equally important, Google is said to slightly favor sites that employ HTTPS in search results.
To make the move to HTTPS, you’ll need to obtain an SSL certificate and install it on your server.
You can do this either by buying an SSL from a trusted source like GoDaddy or DIYing through a provider like Let's Encrypt.
What is an SSL?
SSL stands for Secure Sockets Layer, which is a standard protocol used to create an encrypted connection.
When a user visits your site using an https:// URL, the SSL certificate is sent to their browser. The certificate contains a public key that is necessary for initiating the secure connection, along with other details that help ensure that your server can be trusted. The web server uses the public key in conjunction with a second, private key, to securely scramble and then unscramble communications for the intended recipient.
This is known as public/private key encryption.
Related: Small business network seccurity in the age of cyberattacks
How do you install an SSL certificate on cPanel?
These instructions describe the process of installing an SSL Certificated provided by GoDaddy, which also offers a Managed SSL Service for those in a hurry. The instructions below apply to GoDaddy’s deluxe and extended validation certificates, as well as SSLs for add-on domains or subdomains.
After GoDaddy approves your certificate request, you’ll be notified. Next, just download your certificate from the SSL manager and install it on your cPanel hosting account.
- If you haven't done it already, save the .crt file somewhere that's easy to find.
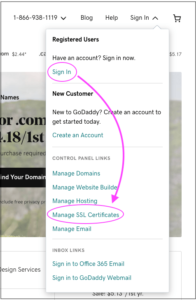
- Now go to your GoDaddy My Products page.
- Select Web Hosting and then Manage for the cPanel account you're installing the SSL on.
- Select cPanel Admin.
- In the Security section, choose SSL/TLS.
- Under Certificates (CRT), select Generate, view, upload, or delete SSL certificates.
- In the Upload a New Certificate section, select Choose File and navigate to the .crt file you downloaded in step 1. Select the file and then click Open.
- Type a description of the certificate in the Description text box if you want.
- Click Upload Certificate.
- When you get confirmation that the certificate has been saved, select Go Back.
- At the bottom of the SSL Certificates page, select Return to SSL Manager.
- Under Install and Manage SSL for your site (HTTPS), click Manage SSL Sites.
- In the Install an SSL Website section, select Browse Certificates.
- Select the certificate that you want to activate and click Use Certificate. This will auto-fill the fields for the certificate.
- At the bottom of the page, select Install Certificate.
- On the Successfully Installed pop up, click OK.
Your SSL certificate is installed! Now you need to direct visitors to the secure version of your site by redirecting to HTTPS.
Prefer a video demonstration on how to install your SSL certificate on cPanel? You’ll find one here, featuring GoDaddy Guide Joplin.